
Hi, how can we help?
- How to transfer a Location between End Users
- Installation Checklist
- Resolving fallback waiting error (for Installers only)
- How to commission a NexBlue Charge Point
- How to connect charge point to 4G during/after installation
- How to create and manage Locations
- What is a Location and why is it important?
- How to transfer ownership to customer (NexBlue Partner App)
- Phase rotation
- Fallback waiting error
- Where is the pin for my charge point/Zen?
- How to make a charge point tethered (lead stays plugged in)
- How to change brightness of charge point light
- How to add a charge point/load balancer to your Location
- How to commission a NexBlue Charge Point
- How to connect charge point to 4G during/after installation
- RCD Test Procedure
- How to check if a product has been encountering any unexpected behavior
- Residual Current Protection
- Phase rotation
- Connect the NexBlue Zen (Load Balancer) to the NexBlue Cloud
- Fallback waiting error
- Where is the pin for my charge point/Zen?
- Resolving fallback waiting error (for Installers only)
- How to add a charge point/load balancer to your Location
- How to use solar energy to charge your car
- How to check if a product has been encountering any unexpected behavior
- How to Connect the NexBlue Zen (Smart Meter) to Wi-Fi
- Integrate solar panel terminal with Load balancer
- How to add a Location thats been shared with you
- Where is the pin for my charge point/Zen?
- How to share a location with an individual/organisation
- How to create/join/invite someone to an Organisation
- How to connect charge point to 4G during/after installation
- How to carry out a factory reset of a product
- How to create and manage Locations
- How to check if a product has been encountering any unexpected behavior
- Charging status
- Phase rotation
- How to transfer ownership to end customer (Partner Portal)
- Pre-configuration: Remotely complete the installation configuration on the portal
- Does every new installer need to get a username and password?
- How to change the main fuse on the Partner Portal?
- How to transfer a Location between End Users
- How to connect a charger to WiFi
- Exporting charging data
- Connect the NexBlue Zen (Load Balancer) to the NexBlue Cloud
- Fallback waiting error
- Where is the pin for my charge point/Zen?
- How to make a charge point tethered (lead stays plugged in)
- How to change brightness of charge point light
- How to add a charge point/load balancer to your Location
- How to connect to your tariff (EcoPilot)
- How to set max charging current
- How to set the charging schedule
- Someone else wants to use my charge point, how can I share it with them?
- How to use solar energy to charge your car
- How to add a charge point in the myNexBlue App
- How to Connect the NexBlue Zen (Smart Meter) to Wi-Fi
- How to configure single phase charging?
- Charger or Load Balancer Not Connecting via Bluetooth
- Firewall Requirements for NexBlue Charge Points
- Resolving fallback waiting error (for Installers only)
- Why have I received an email alert about my charge point(s)?
- My charge point is switched on but the light on the unit is not on
- RCD Test Procedure
- Event List
- How to check if a product has been encountering any unexpected behavior
Table of Contents
How to start a charge using an RFID tag
Table of Contents
This is a simple guide that details how to use an RFID tags to start a charge, for more information on managing RFID tags with NexBlue products, follow this link.
Step 1 - Connect the vehicle to the charger
Using a mode 3 charging cable, plug one end into the socket on the vehicle, and the other into the socket on the charger. It is not possible to plug the cable the wrong way round as the socket designs are different to each other. Make sure that both ends of the cable are fully and firmly inserted into each socket.
Step 2 - Commence the charge
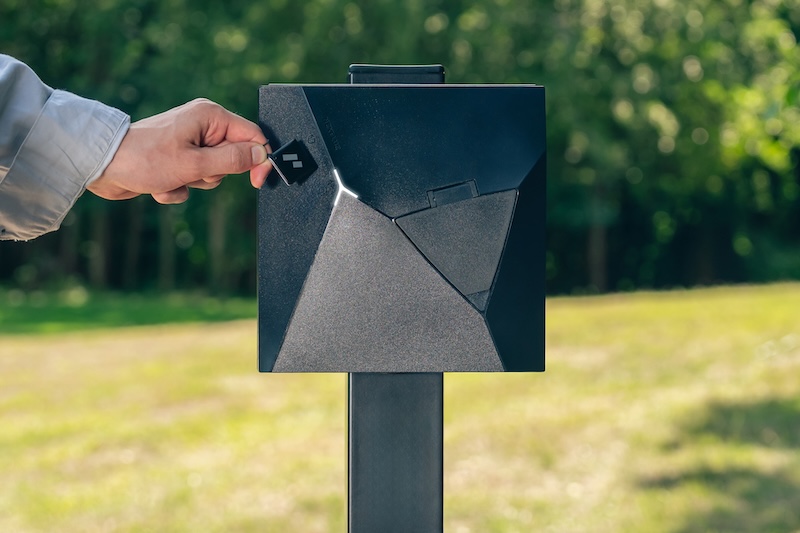
To start charging using the RFID tag, simply tap the RFID card on the charger that is intended to be used on the top left part of the charger where the RFID logo is (see below image) and the charge should commence. If the charger does not start charging the vehicle, check the vehicle settings to ensure that it's set to "charge now" mode, or similar, and that there are no schedules set.
Updated on 18 May 2026