
Hei, hvordan kan vi hjelpe?
- Slik overfører du en lokasjon mellom sluttbrukere
- Installasjonssjekkliste
- Løse feilmelding om reserveventing (kun for installatører)
- Hvordan sette i gang en NexBlue Lade Point
- Slik kobler du ladestasjonen til 4G under/etter installasjon
- Slik oppretter og administrerer du lokasjoner
- What is a Location and why is it important?
- Slik overfører du eierskap til kunde ( NexBlue Partnerapp)
- Faserotasjon
- Feil med reserveventing
- Hvor er PIN-koden til ladepunktet mitt? Zen ?
- Slik kobler du til et ladepunkt (ledningen forblir koblet til)
- Slik endrer du lysstyrken på ladepunktets lys
- Slik legger du til et ladepunkt/lastbalanserer på lokasjonen din
- Hvordan sette i gang en NexBlue Lade Point
- Slik kobler du ladestasjonen til 4G under/etter installasjon
- Prosedyre for test av jordfeilbryter
- Slik sjekker du om et produkt har opplevd uventet oppførsel
- Reststrømbeskyttelse
- Faserotasjon
- Koble til NexBlue Zen (Load Balancer) til NexBlue Sky
- Feil med reserveventing
- Hvor er PIN-koden til ladepunktet mitt? Zen ?
- Løse feilmelding om reserveventing (kun for installatører)
- Slik legger du til et ladepunkt/lastbalanserer på lokasjonen din
- How to use solar energy to charge your car
- Slik sjekker du om et produkt har opplevd uventet oppførsel
- Slik kobler du til NexBlue Zen (Smartmåler) til Wi-Fi
- Integrer solcellepanelterminal med lastbalanserer
- Slik legger du til en posisjon som er delt med deg
- Hvor er PIN-koden til ladepunktet mitt? Zen ?
- Slik deler du en posisjon med en person/organisasjon
- Hvordan opprette/bli med i/invitere noen til en organisasjon
- Slik kobler du ladestasjonen til 4G under/etter installasjon
- Slik tilbakestiller du et produkt til fabrikkinnstillinger
- Slik oppretter og administrerer du lokasjoner
- Slik sjekker du om et produkt har opplevd uventet oppførsel
- Ladestatus
- Faserotasjon
- Slik overfører du eierskap til sluttkunde (Partnerportal)
- Forhåndskonfigurasjon: Fullfør installasjonskonfigurasjonen eksternt på portalen
- Må alle nye installatører få et brukernavn og passord?
- Hvordan bytter man hovedsikring på partnerportalen?
- Slik overfører du en lokasjon mellom sluttbrukere
- Slik kobler du en lader til WiFi
- Eksport av ladedata
- Koble til NexBlue Zen (Load Balancer) til NexBlue Sky
- Feil med reserveventing
- Hvor er PIN-koden til ladepunktet mitt? Zen ?
- Slik kobler du til et ladepunkt (ledningen forblir koblet til)
- Slik endrer du lysstyrken på ladepunktets lys
- Slik legger du til et ladepunkt/lastbalanserer på lokasjonen din
- Slik kobler du deg til tariffen din (EcoPilot)
- Slik stiller du inn maksimal ladestrøm
- Slik stiller du inn ladeplanen
- Noen andre vil bruke ladepunktet mitt, hvordan kan jeg dele det med dem?
- Slik bruker du solenergi til å lade bilen din
- Slik legger du til et ladepunkt i myNexBlue-appen
- Slik kobler du til NexBlue Zen (Smartmåler) til Wi-Fi
- Hvordan konfigurerer man enfaselading?
- Lader eller lastbalanserer kobler ikke til via Bluetooth
- Brannmurkrav for NexBlue Ladepunkter
- Løse feilmelding om reserveventing (kun for installatører)
- Hvorfor har jeg mottatt et e-postvarsel om ladepunktet(ene) mine?
- Ladepunktet mitt er slått på, men lyset på enheten lyser ikke
- Prosedyre for test av jordfeilbryter
- Hendelsesliste
- Slik sjekker du om et produkt har opplevd uventet oppførsel
Innholdsfortegnelse
Slik legger du til et ladepunkt i myNexBlue-appen
Innholdsfortegnelse
De fleste kunder foretrekker å bruke myNexBlue-appen til å kontrollere ladepunktet sitt. Enten det er å sette opp en ny tidsplan, koble til tariffen for å importere automatiserte tider, eller dele laderen som skal brukes med venner og familiemedlemmer, er myNexBlue-appen stedet for alt.
For å kunne gjøre alt dette, og mer, må du imidlertid ha ladepunktet du trenger tilgang til i appen din. Det er viktig å merke seg at QR-kodene på ladepunktene og i installasjonshåndboken er for installatøren å konfigurere, IKKE for kunden å bruke for å ta eierskap til ladepunktet. Tilkoblingsmetoden du trenger er beskrevet nedenfor.
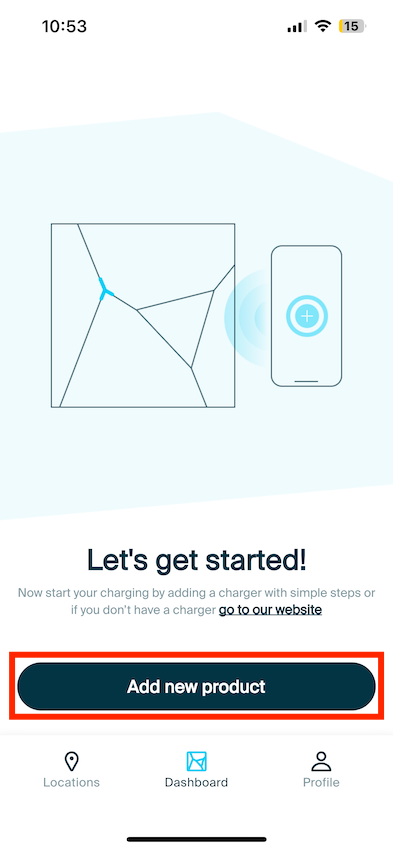
Slik legger du til et ladepunkt
Hvis du eier ladepunktet, bør du ha full kontroll fra installasjonstidspunktet. Før installatøren forlater stedet, bør de overføre plasseringen av ladepunktet til deg. På denne måten har du tilgang til alle enhetene som er installert på den spesifikke plasseringen som de opprettet under konfigurasjonen.
Når installatøren er ferdig med installasjonen, skal de enten vise deg den unike QR-koden på telefonen sin, eller ta e-postadressen din, slik at koden automatisk sendes til e-postadressen din. For å legge til ladepunktet, følg disse trinnene:
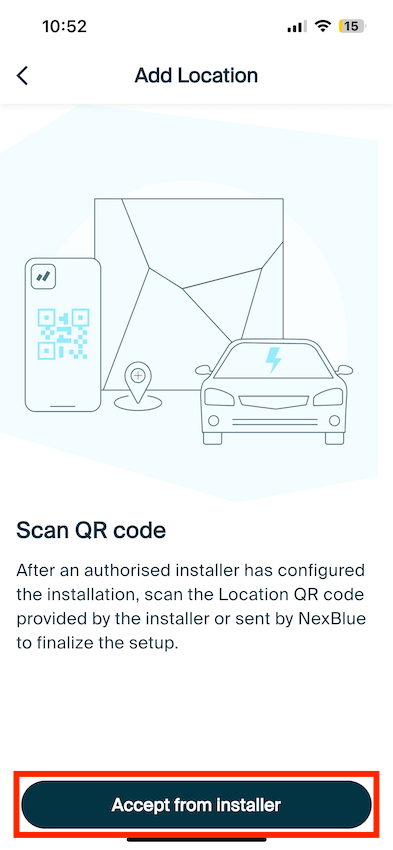
På dette stadiet, skann QR-koden enten på installatørens enhet eller på e-posten din for å få lokasjons-ID-en. Når ID-en er innhentet, godta lokasjonen.
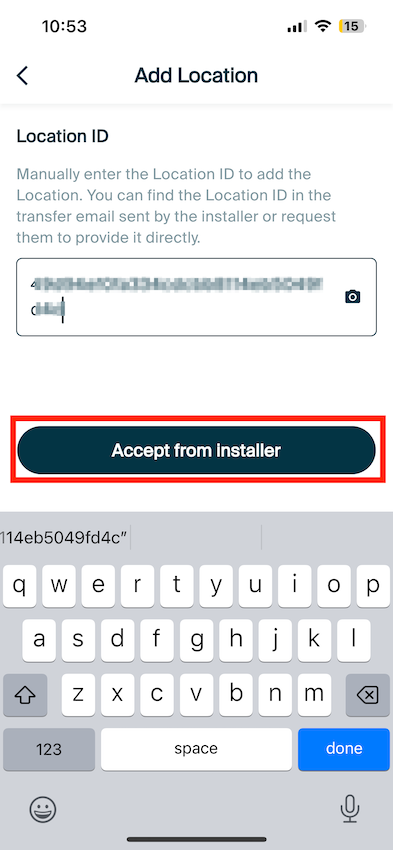
Stedet og tilhørende produkter skal nå vises i myNexBlue-appen din!
Jeg har ikke fått tilsendt en QR-kode til e-posten min, eller blitt skannet fra installatørens enhet. Enheten lyser konstant hvitt.
Hvis enheten blinker hvitt, har installatøren konfigurert den. For å ta eierskap over stedet der ladepunktet er installert, må installatøren overføre det til deg. Ta kontakt med installatøren, de skal kunne gjøre dette gjennom en rekke tilgjengelige alternativer.
Jeg har ikke fått tilsendt en QR-kode til e-posten min, eller skannet den fra installatørens enhet. Enheten blinker gult.
Hvis enheten din blinker gult, har ikke installatøren konfigurert ladepunktet. Det er viktig at installatøren konfigurerer ladepunktet for å sikre at det fungerer innenfor trygge grenser for deg og ikke overskrider lokale restriksjoner for strøm. I dette tilfellet bør du kontakte installasjonsfirmaet og informere dem om denne statusen, de bør deretter returnere til stedet for igangkjøring eller kontakte NexBlue supportteamet med nødvendig informasjon, så kan vi konfigurere på deres vegne.
Oppdatert 18. mai 2026